Showing posts with label cute. Show all posts

Sunday, 10 August 2014

Fairy dust sparkle nails


Did my nails today using my favourite brand - Ciate! I've chosen to use two bottles.


These shades are shown below - one consists of just glitter to go over the top of the pink nail varnish


I use a small funnel to get rid of any unnecessary glitter that hasn't stuck to the nail. This means when applying the glitter, I do it over a cup so that all the glitter can be poured back into the bottle using the funnel!


This is the final result!


Zoe! X


Saturday, 28 June 2014

Pyramid flower nails


Using scented peach revlon nails I've painted my nails.


I then added white flowers to each nail and then a black dot to the centre of the nail, on the nails inbetween I've added a diamanté pyramid to them.


Sunday, 15 June 2014

Models own nail swatch

Here's just a small look at my new Models Own nail varnish, in a pale brown colour! It was easy to apply and plenty of paint gets onto the brush so you're not having to constantly re-dip. 


The nail varnish is super shiny and dries fast, I applied just two coats to my nails which was unusual because normally when applying nail varnish I have to apply  three.

Lovely neutral colour which would work well for weddings or work, giving a classy look.


The nail varnish actually comes with some nail stickers. However, I've chosen not to use them as I'm going on holiday in two weeks and my nails will need re-doing so it'd be a waste of stickers!

Xx


Sunday, 1 June 2014

Ciate Frost Yourself!

 Using Rimmel Lasting Finish nail varnish, I first applied one layer of blue, I then applied a second and a third! It doesn't matter if it's messy because you can remove the excess polish with a cotton bud and nail varnish remover.

Below shows stage one of one layer, stage two - two layers. And the final stage, a third layer.


However, I decided to remove the polish from the middle finger and paint that using Ciate - fit for a queen nail polish as shown below. This is a silver nail polish and shines whatever the weather. I'm also using Ciate - Frost Yourself this can only be bought when purchasing the mini mani month advent calendar.
When applying Ciate frost yourself, you must make sure the undercoat is wet and thick, this is so the little caviare beads stick firmly and don't move.


Above shows the final look! remember to add a top coat to make sure the beads stay on properly!


Wednesday, 14 May 2014

French Manicure

I wanted to do a French manicure on my nails for a whole and could never get the white nail varnish perfectly curved or to look even remotely good!

I read a nail tip in a magazine, the magazine said to create the perfect French manicure... Use hole reinforcer's! 


Start by filing your nail, I tend to file mine square to make them look false and perfect, but you can file them round if you want a more natural look.

Stick the hole reinforcer's just slightly below where the top of the nail has grown past the skin. Don't worry if when you paint it goes wrong you can touch it up using a clear varnish and a cotton bud with nail varnish remover applied to it.

Once the hole reinforcer's are on, paint the top part of the nail white, wait a few seconds then peel off. Do not leave for too long because the hole reinforcer will get stuck and create a jagged edge.


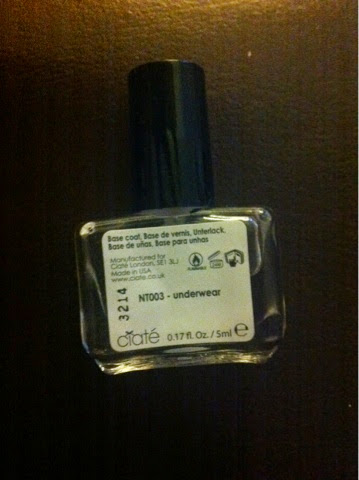
I've used BarryM white nail paint to create the French tip and then Ciate Underwear as the clear coat to make the nail shine but still look natural at the same time. The hole reinforcers can be bought from most stationary shops, I'd recommend WhSmith! But eBay sell them too! 


Above shows the final look! This is a really easy way to create the French manicure and looks really classy, this look would work well for weddings or for general wear. 


Saturday, 10 May 2014

Sparkle rhinestone nails!


Today I received my rhinestone that I'd ordered from eBay! But they're quite fiddly to put on your own hands so I've only put one on my nails to start with! Rhinestones here!

I'm going to use the colours Revlon Girly and Ciate Underwear (but as top coat, because I think it gives the nail a natural shine.) 


Above shows the first coat, it takes a good few coats for it to look good. As you can see it doesn't look too good at the moment, so I'll probably put another 3 layers on top.

Above now shows the nails with an extra 3 coats, I've left one nail blank because I want to use my hole reinforcer's to create a French manicure style on just one of the nails. 


Above shows the hole reinforcer's with one layer of nail varnish on top, again because I've used glittery nail varnish and it's quite watery, I need to add another 3 more layers!


I've layered the nails 3-4 times now and I'm happy with the glittery pale effect! And now it's just time to place one of the diamantés in the centre of the nail just below the French manicure!


Friday, 9 May 2014

Triangle sparkle nails


I've just received my eBay order of some nail art brushes and I'm loving them already and needed to try them out straight away. 

The set comes with 15 brushes and was worth the £2.50!! And they're pink too!
I've chosen to use the thin long brush, this will work best as I want to create a triangle that covers half the nail in the corner. 


I've decided to use my favourite colour from Ciate, pepperminty! And also the 24 hour wear holographic by Gosh! I've taken the photo with the flash on so that you can see properly the holographic effect! 

Starting half way down from the nail I gradually brought the brush stroke up to the centre top of the nail and filled the rest in using the same brush. I did this twice to make sure the colour was bold and brightly coloured.


I then added the Gosh holographic slightly to the side of the green triangle! This works really well, I then finished the nails off with revlon 770 heavenly.