Showing posts with label nail. Show all posts

Thursday, 17 July 2014

Current favourite nail varnish - Barry M


Just going to show you some pictures of my favourite nail varnish at the moment!


It's really glittery and sparkles in the sun, the colour is a neutral pink shade that will go with most outfits so there's no need to worry about it clashing with anything you wear!


Only downside is it's quite rough on the nails, but it looks really pretty! So who cares!?


Saturday, 28 June 2014

Holiday nails!

Just started to do my nails for my holiday as I'll be flying away to Magaluf on Monday!


These nails went a bit wrong so I haven't used this design for my holiday unfortunately! But I will go through what I used and did to create this look.


To create this look I've used DIY nails, nail decals. I'd chosen to use the pineapple design. You can get these from the DIYnails website or Asos.


Here shows the decals, when using them just dip them in the water and place onto the nails but hold them down onto your nails for around 10 seconds so they have chance to stick.


After I painted my nails using beauty Uk nail varnish in green I then applied the decals to the white nail only. I've chosen my middle finger as I will do a zigzag design on the remaining white nail.


I then wanted to create a zig zag nail so I applied a white Barry m varnish on top of the zig zag stickers. As shown in previous posts.


Advice would be to not use glitter over the top of the decals as I found it didn't look as good!


Sunday, 15 June 2014

Models own nail swatch

Here's just a small look at my new Models Own nail varnish, in a pale brown colour! It was easy to apply and plenty of paint gets onto the brush so you're not having to constantly re-dip. 


The nail varnish is super shiny and dries fast, I applied just two coats to my nails which was unusual because normally when applying nail varnish I have to apply  three.

Lovely neutral colour which would work well for weddings or work, giving a classy look.


The nail varnish actually comes with some nail stickers. However, I've chosen not to use them as I'm going on holiday in two weeks and my nails will need re-doing so it'd be a waste of stickers!

Xx


Friday, 13 June 2014

Loreal Confetti speckled egg


Using loreal confetti and Ciate Amazing Gracie, I've decided to create a speckled egg look on my nails!


Starting with Loreal Confetti, I applied one coat to the nails.

This is how it should look! 

I've used too much confetti on one of the nails so I've chosen to remove some as I think it looks a bit too fussy!
I then applied ciate Amazing Gracie over the top of the nails!


I applied one coat, and then continued to apply coats until you can hardly see the confetti!

Below shows how the nails looked after a third coat of Ciate! 

I then applied some more confetti to go over the top to show some darker speckles and overlay the confetti.


Wednesday, 11 June 2014

Neon orange nails

Just replaced my ladybird nails with bright neon orange Gelly nails Barry M.


I've chosen to keep the zig zag nail and just touch it up!


I think this colour works really well an is great for summer. The gelly Barry m gives  the nails a great shine!


Perfect summer nails! Orange for when the sun is shining!

Zoe x

Sunday, 1 June 2014

Ciate Frost Yourself!

 Using Rimmel Lasting Finish nail varnish, I first applied one layer of blue, I then applied a second and a third! It doesn't matter if it's messy because you can remove the excess polish with a cotton bud and nail varnish remover.

Below shows stage one of one layer, stage two - two layers. And the final stage, a third layer.


However, I decided to remove the polish from the middle finger and paint that using Ciate - fit for a queen nail polish as shown below. This is a silver nail polish and shines whatever the weather. I'm also using Ciate - Frost Yourself this can only be bought when purchasing the mini mani month advent calendar.
When applying Ciate frost yourself, you must make sure the undercoat is wet and thick, this is so the little caviare beads stick firmly and don't move.


Above shows the final look! remember to add a top coat to make sure the beads stay on properly!


Saturday, 10 May 2014

Sparkle rhinestone nails!


Today I received my rhinestone that I'd ordered from eBay! But they're quite fiddly to put on your own hands so I've only put one on my nails to start with! Rhinestones here!

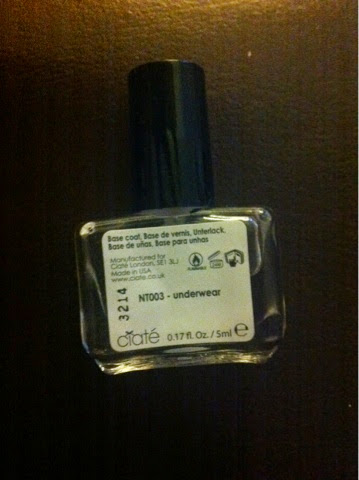
I'm going to use the colours Revlon Girly and Ciate Underwear (but as top coat, because I think it gives the nail a natural shine.) 


Above shows the first coat, it takes a good few coats for it to look good. As you can see it doesn't look too good at the moment, so I'll probably put another 3 layers on top.

Above now shows the nails with an extra 3 coats, I've left one nail blank because I want to use my hole reinforcer's to create a French manicure style on just one of the nails. 


Above shows the hole reinforcer's with one layer of nail varnish on top, again because I've used glittery nail varnish and it's quite watery, I need to add another 3 more layers!


I've layered the nails 3-4 times now and I'm happy with the glittery pale effect! And now it's just time to place one of the diamantés in the centre of the nail just below the French manicure!