Showing posts with label pink. Show all posts
Showing posts with label pink. Show all posts
Saturday, 4 October 2014
Sunday, 10 August 2014
Fairy dust sparkle nails
Did my nails today using my favourite brand - Ciate! I've chosen to use two bottles.
These shades are shown below - one consists of just glitter to go over the top of the pink nail varnish
Thursday, 17 July 2014
Saturday, 10 May 2014
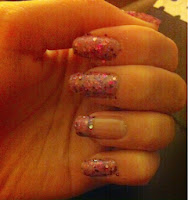
Sparkle rhinestone nails!
I'm going to use the colours Revlon Girly and Ciate Underwear (but as top coat, because I think it gives the nail a natural shine.)
Above shows the first coat, it takes a good few coats for it to look good. As you can see it doesn't look too good at the moment, so I'll probably put another 3 layers on top.
Above now shows the nails with an extra 3 coats, I've left one nail blank because I want to use my hole reinforcer's to create a French manicure style on just one of the nails.
Above shows the hole reinforcer's with one layer of nail varnish on top, again because I've used glittery nail varnish and it's quite watery, I need to add another 3 more layers!
I've layered the nails 3-4 times now and I'm happy with the glittery pale effect! And now it's just time to place one of the diamantés in the centre of the nail just below the French manicure!
Wednesday, 7 May 2014
Ombre nails
I wanted to try out the latest craze - ombre nails out for myself, I think this looks really good and if you make a mistake you can always cover it up using a glittery nail varnish!
I've chosen to use 3 shades of pink! These shades are ciate, Barry M and w7, it's important to pick 3 colours that are slightly similar in colour!
To start with I painted the nail white and then applied a second layer of white Barry M.
Then once dried I applied my three shades of pink to a sponge.
Make sure each shade is even and you do the shades in the right order! Starting with the darkest pink and finishing with the lightest.
Sponge onto the nails, it's ok to make a mess! You can use a cotton bud to get rid of the messy edges.
Apply a second layer of the sponge to your nails and then clean up around the edges, once fairly neat, then apply a coat of glitter nail varnish to make the colours blend and hide any mistakes!
Tuesday, 6 May 2014
Hole reinforcers DIY Nails
Just recently purchased some hole reinforcer's! And yes... They are those things you use to reinforce the holes on your paper inside your ring binder! But I thought they could work well to either create a French manicure or a variety of different circular shapes on your nails! Buy hole reinforcer's here!
Above shows the hole reinforcers, because I only wanted to use half the circle I've cut the reinforcers in half so I get more usage out of them!
Above shows what I used to create my hole reinforcer DIY nails! I've chose to use two similar colours a pink Barry M and also a purple one! I tend to always square my nails off using a glass nail file, I have two different glass nail files - one can be accessed clicking the link and the other is from boots, this gives them more of a false nail look that is close to perfect! As shown below! Glass nail file can be bought here!
So to start with I painted the base of my nails with the purple Barry M, a second layer of the purple and then waited and waited and waited..... And waited - for them to dry properly!
So after waiting.. And waiting.. Now surely is the time to stick on the hole reinforcers? WRONG. The below picture shows what happens if you don't wait for the base coat to dry!!
Sticky nail with a reinforcer peeling your freshly painted nails!
Right, so once the nails are dry, simply stick on the hole reinforcer at the lower cuticle part of the nail and paint your second colour over the top!
Peel off the hole reinforcer instantly, making sure to peel lifting up towards the top of the nail, leaving a neat edge!
Labels:
barrym,
beauty,
Ciate,
glassnailfile,
Hole,
holereinforcers,
nail,
nailart,
nailfile,
nails,
pink,
purple,
reinforcers
Subscribe to:
Posts (Atom)


